
 English
 Español
Home / News / Industry News / The Complete Guide to Elevator Guide Rails: Types, Installation, and Maintenance
Industry News
Tel/wechat/whatsapp: +86-13812695057
E-mail: [email protected]
Content
An elevator guide rail is a steel track installed vertically inside an elevator shaft that keeps the elevator car and counterweight moving in a straight, controlled path. Without guide rails, the cab would sway, tilt, or shift laterally during travel — creating a dangerous and uncomfortable ride. Think of them as the structural backbone of the elevator's vertical movement system. Every time you step into an elevator and feel a smooth, stable ride, the guide rails are doing their job quietly in the background.
Elevator guide rails serve multiple critical functions beyond just directing movement. They provide a fixed surface for the safety gear (also called safeties or clamps) to grip in the event of a freefall or overspeed condition. They also support the weight transferred through the guide shoes or rollers attached to the car frame, absorbing lateral forces generated during acceleration, deceleration, and any uneven load distribution inside the cab. In seismic zones, guide rails are engineered to handle additional horizontal forces from earthquakes, making their selection and installation even more critical.
Not all elevator guide rails are the same. They vary in cross-sectional shape, material grade, surface finish, and intended load capacity. Choosing the right type depends on the elevator's speed, load rating, and the building's structural requirements.
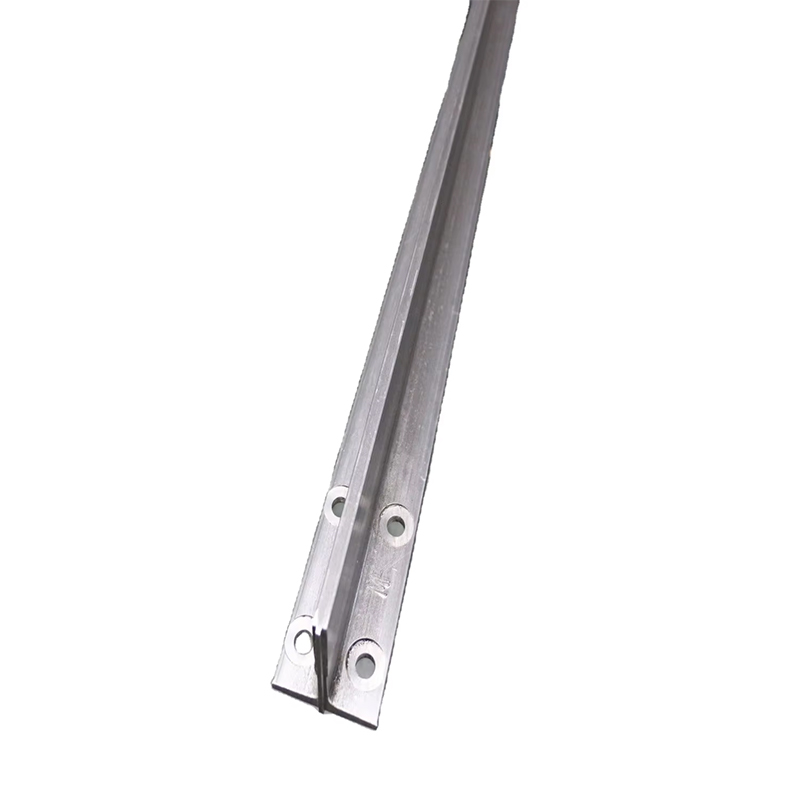
The T-shaped guide rail is by far the most common type used in modern elevators worldwide. Its cross-section resembles the letter "T," with a vertical blade (called the head) that the guide shoes or roller guides engage, and a horizontal base that mounts to brackets fixed to the shaft wall. T-rails are standardized under international codes and come in a range of sizes — the most common being T-45, T-50, T-70, T-82, T-89, T-114, and T-127, where the number refers to the width of the rail head in millimeters. Heavier, faster elevators require larger T-rail sizes to handle greater forces.
Hollow guide rails are used primarily for counterweights and in lower-load residential elevator applications. They are lighter and less expensive than solid T-rails but cannot support safety gear engagement. Because of this limitation, they are only suitable in situations where the counterweight doesn't require independent safety devices, or in very light-duty home lift systems. Their hollow core also makes them unsuitable for high-speed installations where deflection under load becomes a concern.
Guide rails are manufactured through two main processes. Drawn (or cold-drawn) rails are pulled through a die to achieve their shape, resulting in a smoother surface finish straight from the factory. Machined rails have their guide surfaces precision-milled after forming, giving them tighter dimensional tolerances and a superior surface finish. High-speed elevators — those traveling above 2.5 meters per second — typically require machined guide rails to minimize vibration, noise, and wear on the guide shoes. Slower freight or service elevators often use drawn rails, which are more economical.
Elevator guide rail dimensions are standardized to ensure compatibility with guide shoes, safety gears, and rail clips from different manufacturers. Here's a look at common T-rail sizes and their typical applications:
| Rail Size | Head Width (mm) | Weight (kg/m) | Typical Application |
| T-45 | 45 | 4.5–5.0 | Residential, light-duty lifts |
| T-70 | 70 | 8.0–9.0 | Mid-rise passenger elevators |
| T-89 | 89 | 13.0–14.5 | Standard commercial elevators |
| T-114 | 114 | 22.0–24.0 | High-speed, high-rise elevators |
| T-127 | 127 | 30.0–33.0 | Heavy freight and jumbo elevators |
Rail selection is always determined by a structural engineer or elevator designer based on the car weight, rated load, travel speed, bracket spacing, and applicable safety codes. Never substitute a smaller rail size to save cost — undersized rails can deflect beyond allowable limits, causing ride quality issues and safety gear malfunction.
Elevator guide rails are manufactured from carbon steel, typically conforming to grades equivalent to EN 10025 S235 or S355 in European standards, or ASTM A36 and A572 in North American applications. The choice of steel grade affects yield strength, which directly impacts how much deflection the rail experiences under load. Higher-strength steel allows for greater bracket spacing without exceeding deflection limits, which can reduce installation time and material costs in tall buildings.
Surface finish is equally important, especially for high-speed elevators. The guide surface — the part the shoes or roller guides contact — must be smooth, straight, and free from scale, burrs, and pitting. For machined rails, the guide surface roughness is typically specified at Ra 1.6 µm or better. Rough surfaces accelerate wear on guide shoe liners, increase noise, and contribute to vibration felt inside the cab. Some manufacturers apply a light oil coating to rails during shipping to prevent rust, which must be cleaned off during installation before guide shoes are adjusted.
Guide rail installation is one of the most technically demanding phases of elevator construction. Misaligned rails — even by a millimeter — can cause unacceptable ride quality, abnormal wear, and in extreme cases, safety gear failure. Here's how the process works from start to finish:
Before any rails go up, installers drop precision plumb lines from the top of the shaft to establish the exact centerline of the car and counterweight paths. These lines serve as reference points for positioning every bracket and rail section. Modern installations increasingly use laser alignment systems to achieve even greater accuracy, particularly in high-rise buildings where thermal expansion and structural movement over the building's height must be accounted for.
Rail brackets are anchored to the concrete or steel shaft walls at regular intervals — typically every 2.5 to 5 meters depending on the rail size and load requirements. The brackets must be secured with enough embedment or bolt torque to resist both vertical and lateral forces. In concrete shafts, expansion anchors or cast-in plates are used. In steel-framed shafts, brackets are bolted directly to structural steel members. Bracket alignment is verified against the plumb lines before rails are attached.
Individual guide rail sections are typically 5 meters long and joined end-to-end using fishplates (also called splice plates) and bolts. The joint must be flush — any step or gap between sections creates a bump that the guide shoes hit at speed, causing vibration and noise. Experienced installers use a precision straightedge and feeler gauges to check joint alignment, and file or shim as needed to achieve a smooth transition. Joint locations should be staggered between the two rails on the same side so both car rails don't have a joint at the same height.
Once all rails are installed, a final alignment check measures the rail gauge — the distance between the two car guide rails — at multiple points throughout the shaft. This dimension must stay within tight tolerances (typically ±1mm) from top to bottom. The rails are also checked for twist and plumb. Any deviation is corrected by adjusting the bracket mounting before the elevator car is installed. This final gauging step is documented and signed off as part of the installation record.
Guide rails require lubrication to reduce friction between the rail surface and the guide shoe liners, minimize wear, prevent corrosion, and reduce noise. Without proper lubrication, guide shoe liners wear out quickly, the ride quality deteriorates, and the rail surface itself can become scored or pitted over time.
Traditional elevators use automatic rail lubricators — spring-loaded felt or wick-type pads mounted on the car frame that apply a thin film of oil to the rail surface as the car travels. The lubricator reservoir must be checked and refilled during routine maintenance visits, typically every 3 to 6 months depending on usage. The oil used is usually a lightweight machine oil or a dedicated elevator rail lubricant specified by the elevator manufacturer — avoid heavy greases, which can attract dust and gum up over time.
Roller guide systems — used on higher-speed elevators — require less rail lubrication since rolling contact generates less friction than sliding contact. However, the roller bearings themselves need periodic inspection and replacement. Some modern installations use dry-running synthetic guide shoes that eliminate the need for rail lubrication entirely, reducing maintenance requirements and keeping the shaft cleaner.
Like any structural component, guide rails can develop problems over time — particularly in older buildings or high-traffic installations. Knowing what to look for during inspections helps catch issues before they affect safety or performance.
Guide rail maintenance is typically performed as part of a broader elevator preventive maintenance program. Here's what a proper maintenance plan looks like across different intervals:
| Interval | Maintenance Task |
| Monthly | Check lubricator oil level; inspect guide shoe liners for wear |
| Quarterly | Inspect visible rail sections for rust, scoring, and joint condition; refill lubricator if needed |
| Annually | Full shaft inspection including bracket tightness, rail gauge measurement, joint alignment check |
| Every 5 Years | Comprehensive structural review of rail and bracket condition; check anchor embedment integrity |
| After Seismic Event | Full rail alignment and bracket inspection before returning elevator to service |
All maintenance work on elevator guide rails must be performed by licensed elevator mechanics in compliance with local codes such as ASME A17.1 in North America or EN 81-20/50 in Europe. Building owners should keep maintenance records for every service visit, as these are often required during safety inspections and insurance reviews.
Elevator guide rails are subject to strict engineering standards that govern their dimensions, material properties, installation tolerances, and inspection requirements. Compliance with these standards is mandatory in most jurisdictions, and non-compliant installations can result in elevator shutdowns, failed inspections, and liability exposure.
When specifying or replacing elevator guide rails, always verify that the selected product carries documentation confirming compliance with the applicable standard for your jurisdiction. Reputable guide rail manufacturers provide mill certificates and dimensional inspection reports with their products.


Tel/wechat/whatsapp: +86-13812695057
E-mail: [email protected]
Add: Building 7, No. 268, Chang 'an Road, Bache Sub-district, Dong Taihu Ecological Tourist Resort (Taihu New Town), Wujiang District, Suzhou City, Jiangsu Province, China


